Trail Rucking in the UK: Where to Go and What to Carry
As an Amazon Associate we earn from qualifying purchases. This page contains affiliate links — if you buy through them, we earn a small commission at no extra cost to you.
The mud on a South Downs trail in November is a different proposition when you’ve got 8kg on your back. Your standard Sunday hiking gear—the comfortable trainers you’ve worn for years, the rucksack that sits fine on a casual stroll—starts to announce itself in ways you didn’t expect. Hot spots on your shoulders. A blister forming on your heel by the halfway point. Your knees protesting on the descent, not because you’re unfit, but because the weight is shifting your gait in ways you didn’t feel until you added the load.
That’s the moment most people realise there’s a gap between hiking and rucking. The terrain is the same UK countryside, but the physics changes when you’re carrying weight deliberately—and the gear decisions that felt optional suddenly matter.
The honest answer is that good load-bearing backpacks, stable footwear, and careful pack fit matter more than the raw weight itself. Route selection and gear fit are the two things that separate a first trail ruck that leaves you feeling capable from one that leaves you with blisters and a bad back.
Picking the Right UK Trail
Most beginners fixate on distance. They plan a 10-kilometre route and assume it’ll deliver a solid workout. It might—but distance is a poor proxy for difficulty when you’re carrying weight. Elevation gain is what actually dictates the physical stimulus. A flat 12-kilometre canal towpath with 8kg feels nothing like a hilly 8-kilometre loop with 290 metres of elevation gain. The second one is harder, and it’s not close.
The rule that comes up repeatedly in UK rucking community guidance is to start with 5–7 kg of weight and build gradually. That’s enough to elevate your heart rate and engage your shoulders, core, and legs without creating the loading errors that lead to joint pain in the first few sessions. If you’ve never carried load before, resist the temptation to match what you see online—US fitness influencers routinely train at weights that assume months of progressive loading.
For route selection, the terrain type matters as much as the elevation. UK trails split into two categories that behave very differently under load:
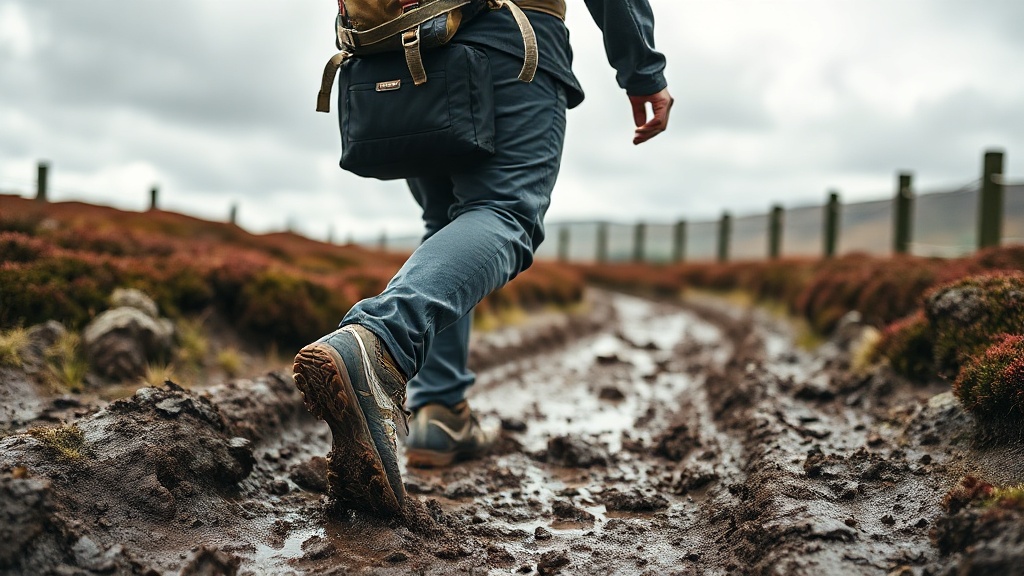
- Soft, muddy trails—think South Downs clay after rain, Yorkshire Dales paths after a wet week, or Scottish lowland tracks in autumn—require footwear with serious grip and a pack that sits close to your back so the weight doesn’t swing on descents. The Salomon Speedcross Peak (paid link) is the shoe that comes up most often for this kind of terrain; the lugs clear mud well and the grip on wet grass and soft ground is genuinely impressive. The trade-off is that it runs warm, doesn’t drain quickly, and feels heavy and tippy on harder packed paths.
- Hard-packed or mixed terrain—canal towpaths, National Trail sections with stone surfaces, coastal paths with a lot of hard limestone—is more forgiving on footwear but still punishes poor pack fit. A shoe like the Inov-8 Trailfly G 270 (paid link) handles this well: the graphene-enhanced rubber outsole gives excellent grip on harder surfaces and decent performance on wet rock, and the roomy toe box accommodates the slight foot expansion that happens under load. The catch, which owners flag consistently, is that the ride is firm rather than cushioned, and the fit splits people: wide forefoot, narrower midfoot and heel. If you’ve got a narrow heel, try these on before buying.
Check Salomon Speedcross Peak price → (paid link)
See it on Amazon → (paid link)
Here’s a quick way to match yourself to a route:
- Beginner + soft/muddy terrain: Choose a shorter loop (6–8 km) with modest elevation (under 300m). The South Downs Way has accessible sections; the Yorkshire Dales has plenty of forgiving lower-level paths. Focus on pack stability, not speed.
- Beginner + hard/packed terrain: A National Trail section or canal towpath works well. Longer distances (10–12 km) are manageable at lower weights because the surface is consistent.
- Intermediate + any terrain: You can push to 10–15 km with 290–680m elevation gain and 10–15 kg. The Epic Trail Series benchmarks an 8k route at 290m gain and a 15k at 680m—useful reference points for what intermediate loading looks like.
The common mistake is choosing a scenic but technically demanding route for a first ruck. Rocky scrambles, bog crossings, and tricky navigation add cognitive load on top of physical load. Save those for when the pack mechanics feel automatic.
What to Carry
Pack fit is the single thing most beginners underestimate. A rucksack that sits high and close to your back keeps the load’s centre of gravity near your own, which means your body works with the weight rather than fighting it. If the pack sags or sits too low, the load swings away from your centre with every step, increasing shoulder rub, fatigue, and the risk of lower back pain. This is the mechanism behind the hot spots and shoulder rub that UK ruckers commonly report—and it’s almost always a fit problem, not a weight problem.
For a dedicated rucking pack, the GORUCK GR1 is the reference point. Owners consistently describe it as bomb-proof—the construction holds up under years of hard use, the laptop compartment is genuinely useful, and once broken in, the shoulder straps are comfortable enough for long sessions. The honest caveat is that it’s heavy for its capacity, the organisation is basic compared to cheaper packs, and at current prices it’s a significant investment. If you want a pack that’ll outlast several pairs of trail shoes, it’s worth its salt. If you’re not sure whether rucking is for you, a Snugpak Response Pack is a more honest starting point—sturdier than it looks, comfortable as a hip pack, and flexible enough for day-kit carry. The trade-off is that it looks utilitarian and isn’t ideal for carrying a lot of gear.
For footwear, the Inov-8 Trailfly G 270 (paid link) is the shoe we’d point most people toward for trail rucking on mixed terrain. The grip is genuinely excellent, durability runs well above average—owners regularly report well over 1,000 miles before the tread gives up—and the zero-drop platform forces good load-carrying mechanics by keeping your foot flat under weight. The firm ride is the honest limitation: if you’re used to a plush trainer, it’ll feel harsh on a long towpath.
If you’re starting out and want to keep costs down, the Decathlon Evadict XT7 is the functional option at roughly £50. It does the job for casual trail use and the durability is decent for the price. The grip on wet ground and rocks is where it falls short, and sole separation—the upper delaminating from the outsole—shows up in enough owner reviews that it’s worth watching. For a regular weekend rucker, the Inov-8 pays for itself in a season.
Socks are where a lot of people cut costs and then pay for it in blisters. Cotton socks hold moisture, which softens skin and dramatically increases blister risk under load. Merino wool manages moisture, regulates temperature, and doesn’t retain odour the way synthetic does. A good pair—Darn Tough Run (paid link) at around £25, or Regatta Merino Wool Socks at roughly £10–15—is one of the highest-return investments you can make before a first ruck. The Regatta option is comfortable and good value, though sizing can be inconsistent and delivery issues come up in owner reviews. Check the size chart carefully.
See Darn Tough Run on Amazon → (paid link)
Now you know what to look for—Get the Free First Ruck Gear Checklist to make sure you’ve got the basics covered before your first loaded outing.
Troubleshooting Common UK Rucking Issues
The pain red flags are straightforward to state. Normal muscle soreness after a loaded walk—a dull ache in the legs, tired shoulders—is expected and fades within a day or two. What isn’t normal is sharp pain, joint swelling, numbness, or pain that worsens as you continue rather than easing. If any of those show up, reduce the load or stop. Continuing through sharp pain is how a minor issue becomes a persistent one.
📺 Watch: How To Care For Your Feet As A Runner — Global Triathlon Network
Blisters and chafing share a common mechanism: heat, sweat, and movement between skin, socks, and the pack. The fix targets each cause. Merino socks manage moisture. A pack that fits snugly—not loose, not bouncing—reduces the movement that creates friction. Body Glide (paid link) or similar friction balms applied to known hot spots (inner thighs, under the hip belt, around the collarbone) add a physical barrier. If a hot spot starts during a ruck, stop and address it before it becomes a blister. Moleskin or a blister plaster stops the progression if you’re already there.
Check Body Glide price → (paid link)
Weight distribution inside the pack matters more than most beginners realise. The common error is loading heavy items—water bottles, food, weights—in the top or side pockets, which makes the pack top-heavy and unstable. Pack heavy items low and close to your back. Water in a bladder against the spine is better than bottles in the side pockets. If you’re using a ruck plate, it should sit in the dedicated plate pocket—not loose in the main compartment where it shifts with every step.
Frequently Asked Questions
How much weight should I carry on my first ruck?
Start with 5–7 kg and build gradually over weeks. The goal is to elevate your heart rate and load your legs and core, not to test your maximum carrying capacity. Most people who start too heavy end up with poor gait mechanics, which is how knee and back issues develop in the first few weeks.
Do I need special boots for trail rucking?
Not necessarily. Many UK ruckers use trail shoes—the Inov-8 Trailfly G 270 is a common recommendation—and find they handle mixed terrain well with better comfort and ground feel than most hiking boots. Boots make sense if you’re on very muddy, technical terrain or if you have weak ankles that need the support. For most UK coastal paths and National Trail sections, trail shoes are the more versatile choice.
What should I do if I get a blister mid-ruck?
Stop immediately. Apply a blister plaster or moleskin over the hot spot. If you continue, the blister will almost certainly worsen and may burst—which introduces infection risk and ends your ruck for the week. Prevention through proper socks and pack fit is significantly easier than managing a burst blister on a remote trail.
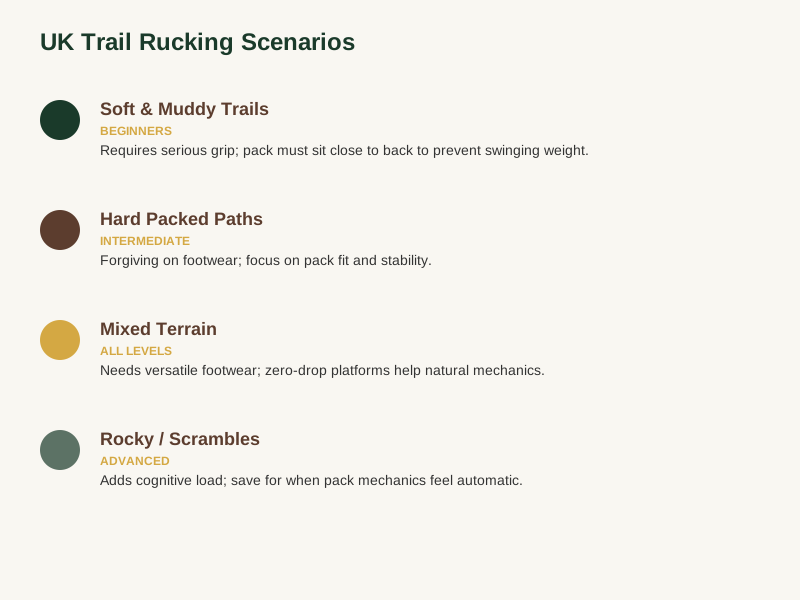
UK Trail Rucking: Route & Terrain Guide
| Terrain Type | Best For | Key Considerations |
|---|---|---|
| Soft & Muddy | Beginners | Requires serious grip; pack must sit close to back to prevent swinging weight |
| Hard Packed | Intermediate | Forgiving on footwear; focus on pack fit and stability |
| Mixed Terrain | All Levels | Needs versatile footwear; zero-drop platforms help mechanics |
| Rocky/Scramble | Advanced | Adds cognitive load; save for when pack mechanics feel automatic |
📺 Watch: You're Probably Using Trekking Poles Wrong — Oscar Hikes
Where to Go From Here
The difference between a first trail ruck that puts you off and one that makes you want to go again comes down to two things: matching the route to your current fitness and gear, and making sure that gear actually works under load. Elevation tells you more about difficulty than distance. Pack fit matters more than pack price. And a good pair of merino socks is not the place to save money.
UK terrain is genuinely varied—soft South Downs clay, hard limestone coastal paths, wet Yorkshire grass—and each surface rewards different footwear choices. The readers who come back for a second ruck are usually the ones who spent an hour getting the pack fit right before they left the house. For route safety and access information, Ramblers, the Mountaineering Council of Scotland and the Institute of Chartered Foresters are worth bookmarking alongside this guide, and for the fuller picture on terrain, weather and events across the UK rucking calendar, our Rucking in the UK: Terrain, Weather, and Event Guide covers that ground.
If you’re ready to sort your kit properly before your first loaded outing, we’ve put together a free checklist that covers exactly what to pack, what to check on your gear before you go, and how to set your pack up so the weight works with your body rather than against it. Grab the Free First Ruck Gear Checklist and start from a solid foundation.
As an Amazon Associate we earn from qualifying purchases. The products linked above are ones we recommend based on independent research and owner feedback.