Concrete vs Trails: Which Surface Wins for Rucking?

As an Amazon Associate we earn from qualifying purchases. This page contains affiliate links — if you buy through them, we earn a small commission at no extra cost to you.
A lot of UK rucking routes don’t stay on one surface. The seafront promenade gives way to shingle. The canal towpath breaks into a stretch of cobbled bridge, then softens back to gravel. A city park loop crosses tarmac, then grass, then a gritty path back to the car park. Most gear advice treats “concrete or trail” as a single choice you make once, at the start, and then forget about — but for anyone rucking the same local loop every week, the more useful question isn’t which surface wins. It’s what actually changes underneath you when the ground does: how hard each step lands, how your pace and stride shift without you noticing, and where the injury risk moves to.
That distinction matters because concrete and trail don’t just feel different — they load your body differently. Concrete removes almost all of the ground’s own give, so your joints absorb what the surface won’t. Trail gives some of that back, but trades it for instability your ankles and hips have to manage instead. Get that trade-off wrong for the surface you’re actually on, and you end up either overworking your knees on the prom or rolling an ankle on a root you didn’t see.
Neither surface is objectively better. What matters is recognising which cost you’re paying on any given stretch, and adjusting your shoes, your pack, your pace and your effort accordingly — rather than running the same setup on both and blaming your gear when one of them punishes you.
The Concrete Factor: Why Pavement Punishes
A concrete seafront has effectively no give. Every footstrike lands and stays landed—the surface doesn’t deform to absorb any of the impact. That means 100% of the force has to be handled by your shoe’s midsole and your joints. Compare that to trail or packed earth, which deforms slightly under each footfall and takes a portion of that force itself. That difference is the whole story.
Add load and the problem compounds fast. A heavier ruck means a harder footstrike, and on concrete that extra force has nowhere to go but up through your legs. Most people’s natural response is to shorten their stride slightly and land a little flatter-footed without realising they’re doing it — a subconscious attempt to soften the jolt. It works, to a point, but it also means concrete miles tend to feel more tiring per kilometre than trail miles at the same pace, even before you account for footwear. Trail shoes weren’t built with this kind of hardness in mind, and one that felt fine on soft ground can start to feel harsh on a long urban ruck — but the bigger shift is happening in your gait, not just under your feet.
Urban concrete adds a second stressor most gear guides skip: the stop-start rhythm of pavement rucking. Kerbs, crossings, crowds and traffic lights break your stride up repeatedly, and each restart means re-stabilising a loaded pack from a standstill — a different demand on your core and shoulders than the steady rhythm you settle into on an uninterrupted trail. A close, high plate placement — the design GORUCK builds the GORUCK Rucker (paid link) around — keeps the load stable against your back through those restarts, which is exactly when a loose-riding pack tends to swing and pull at your shoulders.
Check GORUCK Rucker price → (paid link)
The practical implication: if your regular rucking surface is a seafront, canal path, or city park, cushioning and shock absorption matter more than trail grip. A shoe with a plush midsole will pay off far sooner than an aggressive outsole.
The Trail Factor: Stability and Soft Ground
Trails solve the hardness problem by being softer—but they introduce a completely different set of demands. A packed-earth footpath, a muddy field edge, a wet woodland track: these surfaces absorb some impact but add instability, variable traction, roots, and trip hazards that concrete simply doesn’t have. Where concrete punishes you for how hard you land, trail punishes you for where you land — your foot is making dozens of small placement decisions a minute that a flat surface never demands, and that constant low-level stabilising work is its own kind of fatigue, showing up in your calves and ankles rather than your knees.
📺 Watch: Which Trail Shoe Is Right For You 2026? Road-to-trail, race day, ultra etc — The Running Channel
Trail shoes prioritise grip and mud clearance, which is exactly right for their intended surface and exactly wrong for hard pavement. The outsoles that grip beautifully in soft ground can feel stiff and clunky on concrete, and some—the Salomon Speedcross Peak (paid link) is a good example—can grip too much on wet pavement, making your foot feel tethered rather than free. Owners of the Inov-8 Trailfly G 270 (paid link) often praise its ground feel and stability on mixed terrain, but that same minimal cushioning becomes a liability on a long concrete ruck.
View Salomon Speedcross Peak on Amazon → (paid link)
See it on Amazon → (paid link)
The Salomon Speedcross Peak (paid link) illustrates this trade-off clearly: excellent traction in mud and technical terrain, comfortable out of the box, but it runs warm and doesn’t drain well, which is worth knowing for a UK winter trail. On a wet, muddy coastal path, it’s in its element. On a Brighton seafront in August, it’s a sweaty compromise.
In practice, that means grip, mud clearance and ankle stability are the priorities on trails. Cushioning still matters, but a shoe that favours ground feel over plush padding is the right call here — you’re trading some shock absorption for the traction and confidence uneven ground demands.
Gear, Pace and Safety: Adjusting to the Surface
The surface you’re rucking on shapes more than your shoes — it affects your pack, your socks, your pace, and how closely you need to watch your body for warning signs.
On concrete, the priority is the same close, stable carry that keeps a plate from swinging at every kerb and crossing. On trails, a pack with a genuine hip belt and decent ventilation matters more — the Karrimor SF Predator 30 is a MOLLE-modular pack popular with UK ruckers for mixed terrain, though its waist belt is built to stabilise the load rather than carry real weight off your shoulders the way a dedicated load-bearing hip belt does, so don’t expect more from it than that. A pack that bounces on a trail isn’t just uncomfortable — it shifts your centre of gravity unpredictably, and on uneven ground that’s exactly when ankle rolls happen.
Pack discomfort—shoulder rub, bounce, hot spots—almost always comes down to load position relative to your spine and how snug the straps are. Getting the hip belt tight and the load high and close fixes most of it, on either surface. But concrete raises the stakes: because impact forces are already higher underfoot, a bouncing pack adds insult to an injury that’s already accumulating with every step.
For socks, merino wool manages moisture on both surfaces better than cotton, which is where most blister problems start. On warmer trail days, a lighter option like Darn Tough’s Vertex line keeps feet cooler than a heavy-duty walking sock; on a cold concrete ruck, the extra warmth of a denser merino blend earns its keep.
None of this works as a single kit list, because the priority is surface-led. Concrete rewards cushioning and a close, stable carry; trails reward grip, mud clearance and a pack with real hip support. Pack the wrong priority for the ground you’re actually on, and you’ll spend the session compensating for it instead of enjoying it.
Now you know what to look for—Get the Free First Ruck Gear Checklist to get a tailored list of shoes and socks for your specific terrain.
Pace works in opposite directions depending on the ground. On concrete, the higher impact per step rewards a shorter stride and a slightly more upright posture — both reduce the braking force that hammers your knees on each footfall, even though it can feel like smaller, less efficient steps than you’re used to. The stop-start nature of urban rucking — kerbs, crossings, junctions — adds a fatigue layer that catches beginners out, because it isn’t the distance that wears you down, it’s the constant re-acceleration.
On trails, the limiting factor shifts from pace to footing: trip hazards, wet rocks, and soft patches that give way without warning. Rushing a technical stretch under load is how ankle rolls happen, and a rolled ankle on a descent is a genuinely more likely injury than anything concrete does to your knees on the flat. Slowing down on uneven ground isn’t a fitness failure — it’s the correct adjustment for the terrain.
Both surfaces share one rule regardless of pace or gear: sharp or persistent pain is a signal to stop, not push through. General weight-bearing exercise guidance, including from the NHS and the Royal Osteoporosis Society, is consistent on that point — build load and distance up gradually, and treat pain that doesn’t ease with rest as a reason to get it checked, not something to train around. If knee pain, foot pain, or joint soreness persists beyond a few sessions, see a GP or physio — that’s not a gear problem, it’s a professional matter, and no article is a substitute for that assessment.
Frequently Asked Questions
Can I use trail shoes for urban rucking?
Yes, but expect them to be stiffer and less cushioned than road shoes designed for hard surfaces. They’re workable for lighter loads, but a heavy urban ruck on concrete will expose the mismatch—your feet will fatigue faster and the outsole will feel clunky on pavement.
What’s the best surface for rucking?
There’s no universal answer. Concrete is harder but predictable—you know exactly where your foot will land. Trails are softer but add instability, mud, and trip hazards. Choose based on your gear and your fitness level. Most beginners find trails more forgiving on their joints; experienced ruckers who want to build impact resilience often deliberately include concrete sessions.
Do I need special socks for rucking?
Merino wool socks are worth the investment for rucking on any surface. They manage moisture without holding it like cotton does, which is the single biggest factor in preventing blisters under load.
How much weight should I carry on concrete?
Start lighter than you think. A common mistake is loading up too fast because you feel strong at the start—but concrete amplifies impact with every step, and the fatigue builds over distance rather than showing up immediately. For flat, hard ground like a seafront or canal path, general beginner guidance puts a sensible starting point around 10% of your bodyweight, built up gradually over several weeks rather than jumped to on day one.
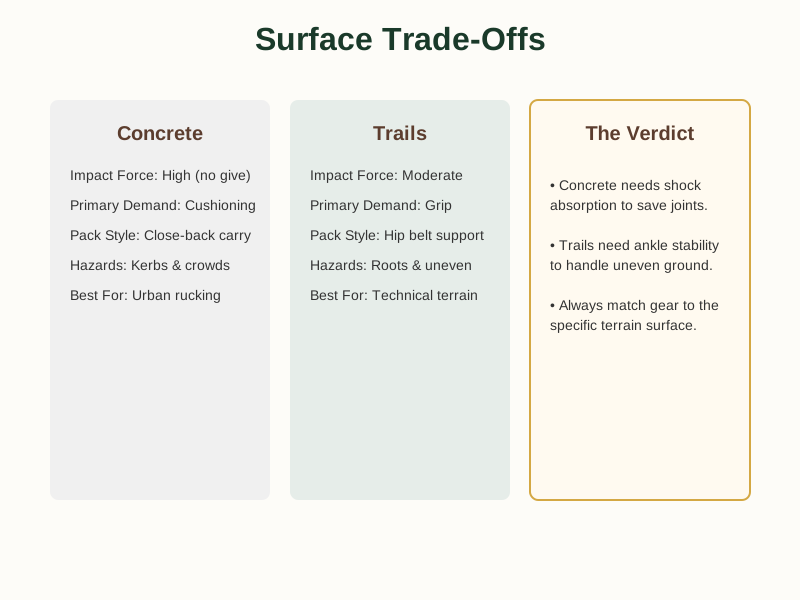
Surface Comparison: Concrete vs Trails
| Feature | Concrete | Trails |
|---|---|---|
| Impact Force | High (no give) | Moderate (absorbs some) |
| Primary Demand | Cushioning & Stability | Grip & Ankle Support |
| Pack Style | Close-back carry | Hip belt & ventilation |
| Common Hazards | Kerbs & crowds | Roots & uneven footing |
| Best For | Urban rucking | Technical terrain |
Adjusting on the Fly
The surface you’re rucking on shapes everything: the shoes that serve you, how stable your pack feels, how you pace yourself, and where your injury risk actually sits. Concrete demands cushioning and a close, stable carry. Trails demand grip, ankle awareness, and a pack that copes with sweat and uneven weight distribution. Most of what gets blamed on “bad gear” is really just the wrong setup for the ground underfoot — and the fix is adjusting as the surface changes, not buying your way out of it once and hoping it covers everything.
📺 Watch: Inner Knee Pain? Try This 2-Minute FIX! — Will Harlow – Over-Fifties Specialist Physio
If you’re not sure which shoes and socks actually suit your regular route, the Free First Ruck Gear Checklist is a straightforward next step—it cuts through the noise and gives you a starting point grounded in what the terrain actually demands. For the fundamentals beyond footwear and surface, our guide on how to start rucking in the UK covers pack weight, pacing, and getting your first few sessions right.
This draws on general weight-bearing exercise guidance from the NHS and the Royal Osteoporosis Society, plus manufacturer and independent testing data from Salomon — it’s general guidance rather than a substitute for a GP or physio if something’s already causing you pain.
As an Amazon Associate we earn from qualifying purchases. The products linked above are ones we recommend based on independent research and owner feedback.