Ruck Plates vs Sandbags vs Water Bottles: Which Weight Works Best?
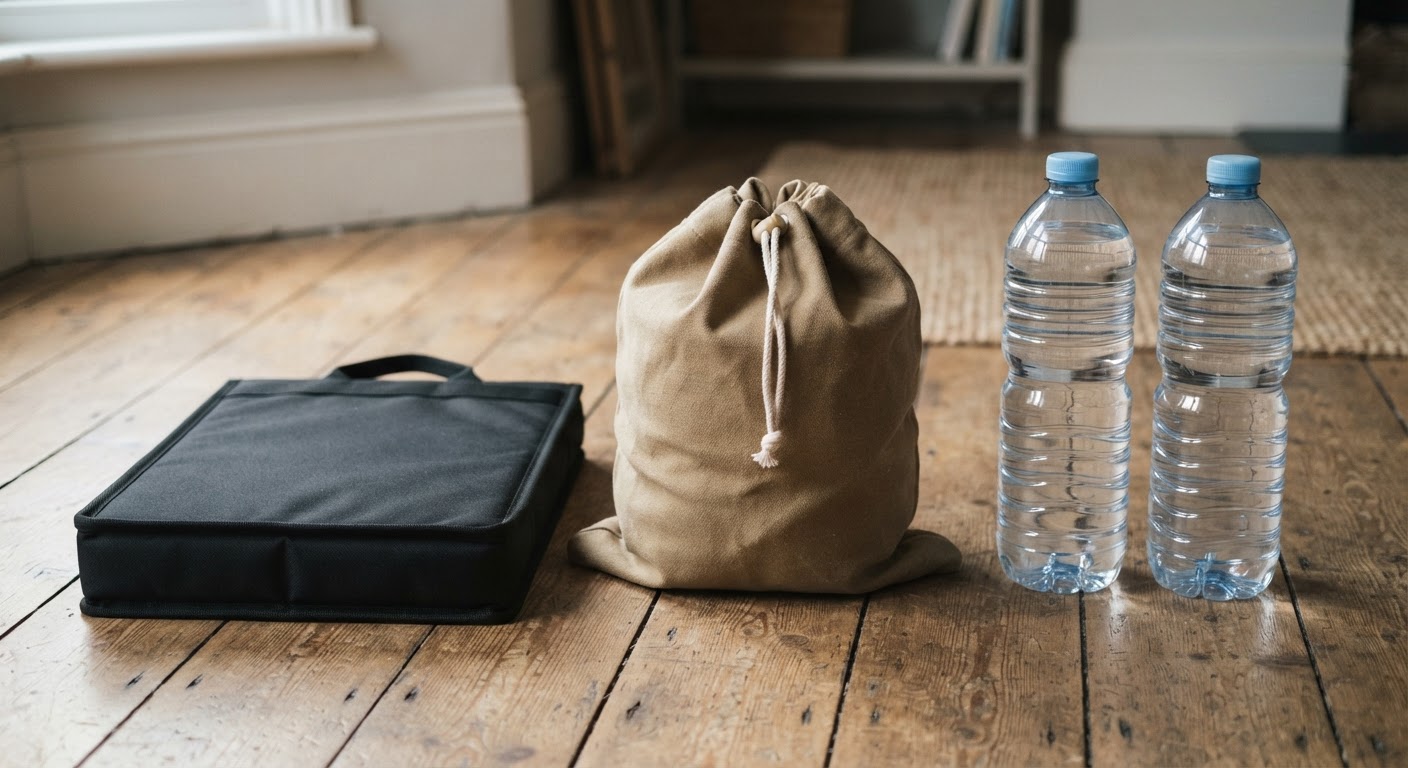
Weight is weight, or so the thinking goes: strap enough of it to your back and your body won’t know a steel plate from a bag of sand from four bottles of Highland Spring. That assumption survives right up until the first proper ruck. A plate stays exactly where you put it. Sand does not. A bottle rolls. The gap between those three behaviours matters more than the number on the scale — it’s the reason two people carrying an identical 8kg can have completely different sessions, one training, one just enduring.
So the question most people ask — “should I get plates, sandbags, or just use water bottles?” — is really three questions stacked together: which one stays put, which one fits your budget, and which one you’ll actually use. Answer those in order and the choice mostly makes itself.
The “High and Close” Rule: Why Stability Beats Weight
Here is the principle that separates a useful ruck from a painful one: weight needs to sit high and tight to your spine. Not low in the bag, not bouncing against the base, not rolling side to side with every stride. High and close.
The mechanics are straightforward. When weight sits close to your centre of gravity, your body treats it as part of itself. When it shifts — particularly down and away from your spine — it creates a longer lever arm. That longer lever means your lower back and shoulders have to work harder to stabilise the load with every step. More work per step means earlier fatigue, higher risk of lower-back strain, and more rubbing where the pack meets your shoulders and hips.
This is where the “consistency trap” kicks in. If the load bounces and shifts on every step, your body reacts by changing how it moves — shorter strides, favouring one side, adjusting your posture to compensate. That hobbling pattern is not just inefficient; it is how most people end up sitting out the next session with a sore back or blistered shoulders. Force-Fit UK calls this out directly: too much weight, or weight that moves unpredictably, causes hobbling and interrupts training consistency.
On a UK coastal path in wind and rain, this gets worse. The uneven terrain and wet footing mean your gait is already less stable than on a flat road. A shifting load amplifies that instability rather than being absorbed by it. The pack feels heavier than it is because your body is fighting it on every step rather than moving with it.
The fix is not necessarily a lighter load — it is a load that stays where you put it. Compression straps on a rucksack help, but they cannot fully compensate for weight that is fundamentally unstable by design. Which brings us to the options and where each one sits on the stability spectrum.
Ruck Plates: The Consistency Winner
Ruck plates are the option that best earns the “high and close” label. They are shaped to slot into the dedicated plate pocket of a rucking pack — typically a sleeve positioned close to the spine — and once seated they stay there. The difference shows up fast once you’ve used both: plates do not shift during running intervals, they do not bottom out when you sit down, and they do not cause the pack to ride lower as the weight migrates.
The reason is partly geometry and partly material. A rigid plate has no internal movement. It cannot slosh or roll. Once your compression straps are cinched, it is essentially locked into position. That matters for bone density and endurance training in particular: a consistent load means a consistent stimulus. If you are rucking to build strength and cardiovascular fitness, the adaptation comes from a predictable, repeatable stress — not from a load that is different on every step because it has migrated.
Durability is another genuine advantage. A steel or dense polymer plate does not degrade. It will not leak, split, or lose shape over time. You buy it once and it performs the same way for years. For someone who plans to make rucking a regular part of their training — a few sessions a week, building from 10% body weight upward — that upfront cost tends to make more sense than repeatedly replacing cheaper alternatives that break down.
The honest trade-off is price and compatibility. A dedicated ruck plate needs a pack with a plate sleeve or pocket to work correctly, and price spans a wide range: Mirafit’s cast iron plates start under £25 for the lightest option and climb from there, while a branded option like GORUCK runs closer to £50–£80 for a single plate. The GORUCK Rucker (paid link) is a concrete example available on Amazon UK, in that GORUCK price bracket, purpose-built to slot into a plate pocket and stay put. Mirafit’s plate is the budget end of that range — it undercuts the premium brands by a wide margin, and for two or three sessions a week it does everything a plate needs to do without complaint. What you trade for that saving is the premium contouring and edge finishing of the pricier brands, which can make a difference in comfort over longer sessions.
See GORUCK Rucker on Amazon → (paid link)
If you are rucking two or three times a week and want a load that behaves predictably so your body can adapt rather than compensate, plates win. They are not the cheapest option and they are not the most flexible, but they are the most consistent — and consistency is the mechanism that makes the training actually work.
Sandbags: The Budget and Adaptability Choice
Sandbags win where plates lose: price and adaptability. You can pick one up for under £20, make one yourself from a strong gym bag and a trip to a builders’ merchant, or use it for a dozen different exercises beyond rucking — sandbag squats, carries, ground-based work. For someone who wants a single piece of equipment that works across multiple types of training, this flexibility is genuinely useful.
The problem is that sand moves. Inside a bag, even a well-sealed one, the material shifts and redistributes as you walk and especially as you run. The weight migrates away from the spine, the pack rides lower, and your body starts the compensation pattern described above. The shifting is manageable at walking pace on flat ground, but it becomes a real problem during faster work or on uneven terrain — exactly the situations where a UK coastal path or muddy footpath puts the most demand on your stability.
DIY sandbags add a particular set of risks. Getting the seal right is fiddly, and a split seam on a heavy bag mid-ruck is not just inconvenient — it redistributes the load abruptly, which is how you hurt yourself. A commercial sandbag with a proper closure system handles this better, but you are then spending enough that the price gap with a basic ruck plate starts to close.
The other honest caveat is mess. Sand is abrasive and it gets everywhere. If you are storing your rucking kit in a car or a spare room, the fine dust works its way into zips, fabrics, and seams over time. It is a bit of a faff to deal with properly, and it is the reason many owners eventually migrate toward rigid weights once they have the budget.
Sandbags are worth starting with if you are genuinely unsure whether rucking will become a habit. The cost is low enough that a failed experiment does not leave you with expensive gear you never use. And if you are someone who already does sandbag or functional fitness training, using the same kit for rucking is a sensible reuse of equipment you already own. But once you are committed to regular sessions, the instability trade-off starts to cost you more than the saving is worth.
Water Bottles: The “Try It Now” Option
Here is the reality: you can start rucking right now with bottles you already have in your kitchen. Fill a couple of 1.5-litre plastic bottles with water or sand, drop them in your existing backpack, and you are moving. No purchase, no delivery wait, no decision paralysis.
That accessibility is genuine and worth acknowledging. For someone who has read about rucking and wants to test whether the idea appeals before spending money, bottles are the lowest-friction entry point. And for a beginner working with very light loads — 3 to 5 kg — the instability issues described above are less pronounced, because the mass is too low to create a significant lever effect even if it does shift.
The problems scale with weight. A bottle is round. Inside a rectangular pack compartment, it rolls. As you add more bottles to hit a meaningful training load — say, 8 to 10 kg for an 80 kg adult — the cumulative rolling and shifting starts to matter. Pack ride becomes uneven, compression straps struggle to keep everything locked down, and the familiar compensation pattern emerges: shorter stride, aching lower back, chafing at the shoulder seams. Owners who have tried bottles alongside other options consistently report this as the point where they made the switch.
Bottles are also not designed for load-bearing. Plastic can split under sustained pressure, particularly if you sit down with a full pack or if the bottles are pressed against a hard frame panel. Metal bottles handle this better but add weight without improving the geometry — the fundamental issue of a cylindrical object in a rectangular space does not change.
Use bottles for short, light sessions to test whether rucking suits you. Once you are ready to build beyond that — and once the weight starts to matter — the shifting problem becomes the limiting factor, and a plate or a more stable pack arrangement is worth the investment.
How Much Weight Should You Carry?
If the stability question is the most important thing the article covers, weight selection is the second most common mistake. Most beginners start too heavy because they have seen what experienced ruckers carry, or because a US influencer makes a heavy load look easy.
📺 Watch: Rucking 101: Start SLOW Start SMALL! From beginner to advanced — JB Outside
The common starting point — widely used in UK rucking guidance — is roughly 10% of your body weight. For an 80 kg adult, that is about 8 kg. For a 65 kg adult, closer to 6.5 kg. This is not a precise clinical threshold; it is a practical benchmark that gives you enough load to generate a training stimulus without overwhelming your joints and connective tissue before they have adapted. Start there. If it feels trivially easy after a few sessions, add a kilogram or two. If you are noticing aches, back strain, or a pronounced change in your gait, drop back.
| Body Weight | Target Load | Notes |
|---|---|---|
| 60 kg | 6 kg | Lighter load for stability |
| 70 kg | 7 kg | Standard starting point |
| 80 kg | 8 kg | Common UK guideline |
| 90 kg | 9 kg | Adjust for fitness level |
| 100 kg | 10 kg | Upper limit for beginners |
Force-Fit UK is direct about this: carrying too much weight causes the hobbling pattern that breaks training consistency. The body starts protecting itself by reducing stride length and shifting load distribution, which in turn changes the mechanics of the activity and can create secondary strain issues in the knees, hips, and lower back. This is not a reason to be timid — it is a reason to progress gradually. The adaptation happens over weeks, not days.
The honest answer on how much weight is this: start lighter than you think, and pay more attention to how the load feels and whether it shifts than to the number on the scale. A stable 8 kg load will train you better than an unstable 15 kg that you are fighting on every step.
What’s Left Standing
Rule the options out rather than rank them, and the same answer falls out the other end. Water bottles are the first to go once you are past the testing phase: round bottles roll in a rectangular pack, and neither plastic nor a thin metal shell is built for repeated load-bearing pressure session after session. Sandbags go next once you are training two or three times a week on purpose — the shifting problem does not resolve itself with a tighter drawstring, and it gets worse, not better, as pace and terrain get harder, precisely when you need the load to behave. What’s left standing is the ruck plate. Not because it wins on every count — it doesn’t, on price or flexibility — but because it is the only option that does not fail under the conditions that actually matter: regular sessions, real pace, UK terrain. Sandbags keep a place for anyone still deciding whether rucking sticks, or anyone who already owns a set for other training. Water bottles keep theirs for the first honest go before you spend a penny.
The mechanism underneath all of this is the one the whole article has been building to: a load that shifts creates a longer lever arm, which forces your body to compensate, which breaks the consistency that makes the training work. Compression straps and careful packing mitigate that, but they are working against the physics of the material rather than with it. A plate removes the problem at the source instead of managing around it.
Now you know what to look for — Get the Free First Ruck Gear Checklist to help you choose the right pack and weight setup for your first proper session.
Frequently Asked Questions
Can I use any backpack for rucking?
You can, but it matters whether the pack has a hip belt and compression straps. Without a hip belt, all the weight sits on your shoulders and upper back, which is where the chafing and fatigue start. A well-fitted belt can move as much as 60 to 80% of the total weight onto your hips, and that is the difference between a 45-minute session you recover from and one that leaves you sore for days. If your current pack is a basic day bag without these features, budget for an upgrade alongside your weight choice — our buyer’s guide to UK rucking rucksacks covers what to look for.
Is rucking bad for your knees?
Rucking is generally low impact and well-tolerated by most healthy adults. If you have existing knee issues, joint problems, or any history of lower limb injury, it is worth checking with a GP or physio before starting — not because rucking is dangerous, but because the right starting weight and progression speed depends on your individual situation. The same applies if you have been advised to be cautious with weight-bearing exercise for bone health reasons: the Royal Osteoporosis Society has guidance on this, and it is worth reading before you start loading up.
What weight should a complete beginner start with?
Aim for around 10% of your body weight as a baseline — roughly 6 to 8 kg for most adults. If you are using bottles or sandbags to start, this is easy to dial in: fill two 1.5-litre bottles with water for roughly 3 kg, and add more or a second pair to reach your target. The key is that if 10% feels hard from the first session, do not push through — drop back to something lighter and build gradually. Rushing the load progression is the most common way beginners end up with pain that puts them off entirely.
Can you run with a rucksack?
You can, and many training programmes include running intervals as part of a ruck session. The critical requirement is that the load stays stable — if the pack bounces or the weight shifts, running amplifies the problem significantly. This is where plates pull well ahead of sand or bottles: they stay put during faster movement, which means your stride stays consistent and your lower back is not fighting a shifting load mid-stride. If your pack does not have a dedicated plate pocket and reliable compression straps, hold off on running until you have that sorted.
How do you stop chafing when rucking?
Load-related chafing has two main causes: moisture and movement. Moisture softens skin and increases friction — merino wool socks and moisture-wicking base layers help here. Movement is the other factor: a shifting load means the pack rubs differently on every step, which is why stability matters so much for skin as well as for joints. Anti-chafe products applied to areas that rub — shoulders, hips, collarbone — are useful as a backstop, but they will not fully compensate for a pack that does not fit well or a load that will not stay put. The honest fix is getting the pack fit right first, then managing moisture second.