How to Pack a Rucksack for Rucking (So It Doesn't Bounce)
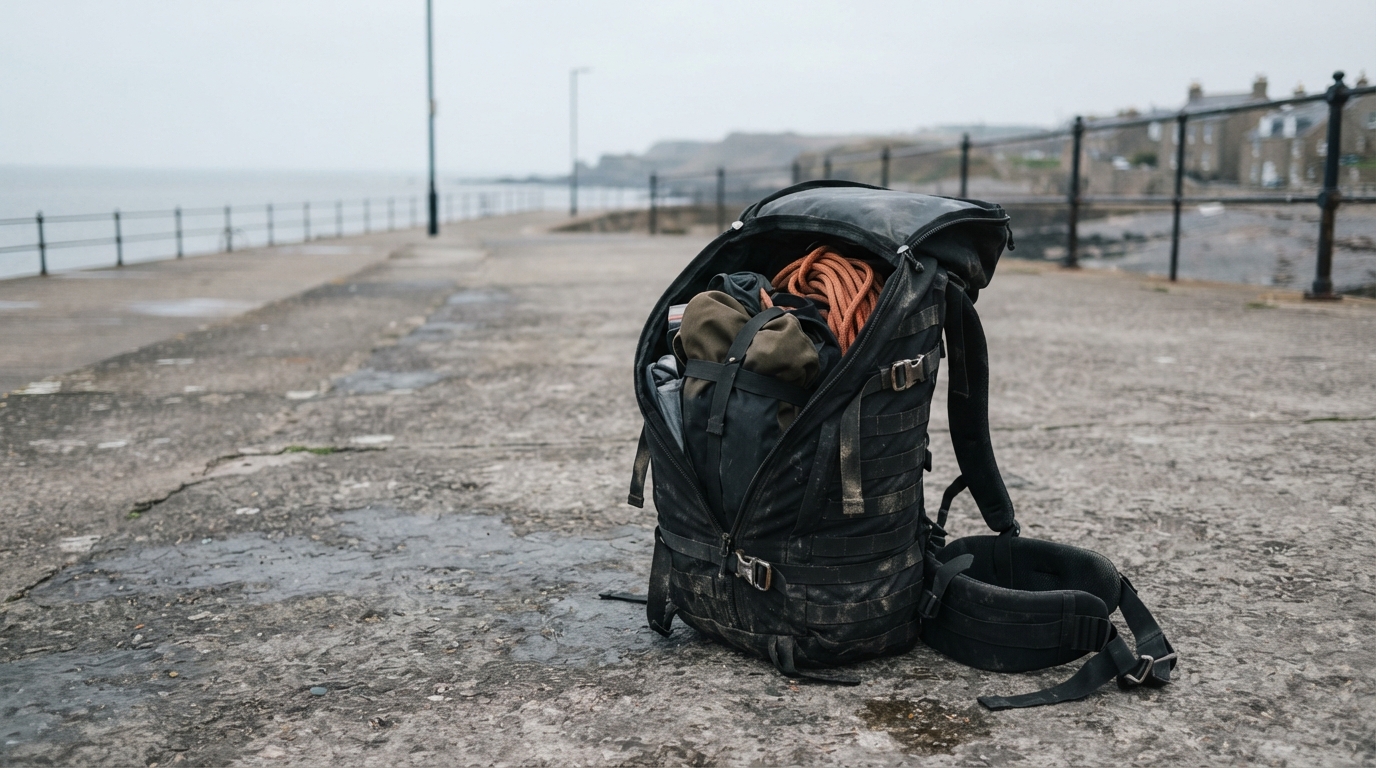
As an Amazon Associate we earn from qualifying purchases. This page contains affiliate links — if you buy through them, we earn a small commission at no extra cost to you.
When a loaded pack bounces, three things usually take the blame first: the brand of bag, the amount of weight, or the rucker’s own form. Rule out the brand — a big name on the label doesn’t stop a pack shifting if it isn’t built for sustained load. Rule out the weight — plenty of people carry 10 kg comfortably in the right setup and struggle with half that in the wrong one. Rule out fitness and technique too; even experienced ruckers end up with a bouncing, spine-jabbing pack when the bag itself, and the way it’s loaded, aren’t suited to the job.
What’s left once those are ruled out is the bag’s design and how it’s packed. A standard backpack — the kind most people already own — isn’t built for the sustained, loaded movement that rucking demands, and even a purpose-built rucksack will bounce if it’s loaded carelessly. This article covers why that bounce happens, what the right gear does to stop it, and how to pack so your first ruck, or your fiftieth, feels stable from start to finish.
The Rucksack vs. Standard Backpack Decision
Before getting into the mechanics of how to pack, there’s a fundamental question worth answering: does the bag you’re using actually do the job?
A rucksack is built for three core tasks that a standard backpack simply isn’t engineered to perform. First, it distributes load impact evenly across your back to protect your spine under sustained weight. Second, it maintains stable positioning during movement — no sliding, no shifting, no bounce. Third, it provides structural integrity to hold heavy loads without sagging, poking, or failing mid-ruck.
A standard school bag or generic hiking pack handles the first job poorly because it has no dedicated weight spots. The padding is distributed evenly, which feels comfortable when carrying books or a laptop. Under 15 kg of steel plates and water bottles, that same even padding concentrates force unpredictably across your spine. The second failure is the lack of chest straps. Without a sternum strap, the pack is held to your body only by shoulder straps, meaning it can rock, slide, and shift with every stride — on a coastal path or an uneven trail, that rocking is usually where the shoulder fatigue actually comes from, not the weight itself. The third problem is structural: a bag rated for 10 kg loaded to 20 kg will eventually tell you about it — usually at the seam where the shoulder strap attaches to the pack body.
A purpose-built rucksack solves all three. Dedicated weight pockets — often called weight spots or plate pockets — keep the load high, centred, and pressed against your back rather than hanging away from your body. Chest straps pull the pack tight against your torso and stop it rocking. Military-grade construction means the stitching and hardware are rated for the loads you’re actually putting through them.
The honest summary: a standard backpack is a reasonable compromise for the occasional light walk with a few extras. Once you’re regularly carrying more than 10 kg, or doing routes over a few miles, the bounce and the spine loading become a genuine issue rather than a minor inconvenience. For anyone serious about making rucking a consistent part of their training, the purpose-built rucksack isn’t luxury spending — it’s the thing that makes the practice safe and effective.
If you’re weighing up whether to go vest or pack for your load work, our Weighted Vest vs Rucksack guide runs through the decision in full. And once you’ve decided on the pack, our buyer’s guide to the best rucksacks for rucking covers the options worth considering.
Not sure which direction to go? Get the Free First Ruck Gear Checklist — it breaks down what you actually need depending on your starting point and goals.
Now you know what to look for, let’s get into how to pack it.
The Golden Rule of Load Positioning
Once you’ve got a purpose-built rucksack, the bounce problem doesn’t automatically disappear. Plenty of people buy a decent ruck pack and still load it badly, then wonder why it still shifts. The fix is the same whether you’re using a GORUCK Rucker (paid link) or a Karrimor SF daypack: the high and tight rule.
Check GORUCK Rucker price → (paid link)
Keep the heaviest items as close to your spine as possible, positioned between your shoulder blades and the small of your back. This is the natural balance point of your body. When weight sits here, it moves with you rather than swinging away from your centre of gravity and pulling you off-kilter with every step. Weight spots help evenly spread impact on your spine and prevent shifting — which is essentially what high and tight is doing mechanically.
The left-right balance matters just as much as the front-back position. If you put your water bottle on the left side and your snack pouch on the right, the pack will want to twist your torso with each stride. On flat ground that’s annoying. On a wet coastal path with uneven footing, it’s the difference between a stable hike and a rolled ankle.
Use every compression strap your pack has. These aren’t decorative. They’re the mechanism that hugs the contents to your back and eliminates the air space where load can shift. Strap everything down tight — not so tight you can’t close the pack, but tight enough that the contents don’t move independently. Don’t overstuff either. Leave a small air gap so the straps can actually do their job; a stuffed-to-bursting pack that won’t close properly is a sign you’ve exceeded what that compression setup can handle.
Here’s a simple way to check: imagine your pack is a suitcase and you’re closing the lid. If you can’t close it without forcing it, you’ve overfilled. If you close it easily and the contents still rattle when you shake it, you haven’t strapped it down enough.
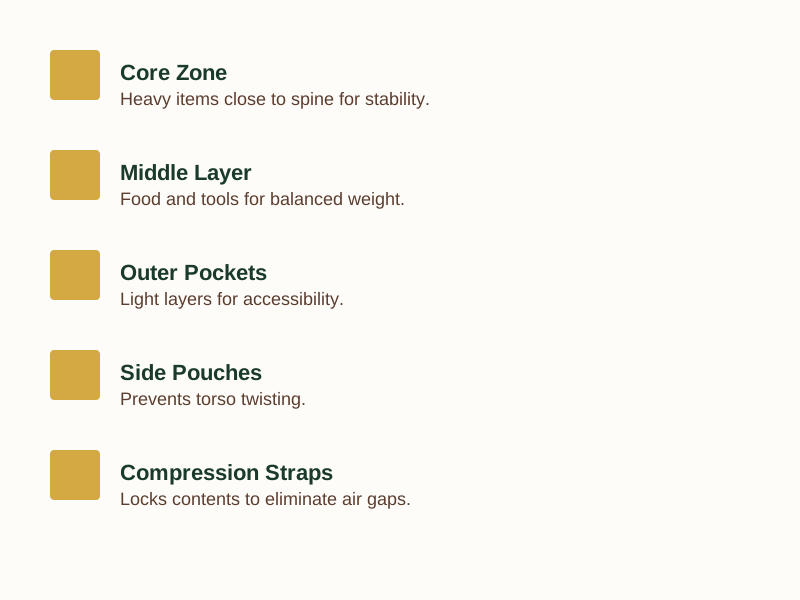
Where you place specific items matters. Heavy, dense weight (ruck plates, water bladders, sandbags) goes in the dedicated plate pocket or centred against the back panel. Medium items (food, tools, a first aid kit) sit in the middle layer. Light items (spare layers, a rain jacket, a sleeping bag for overnighters) fill the top and outer pockets. Dense and heavy close to your back, light and bulky further away.
On longer UK routes, where you might be out for three hours or more on variable terrain, this packing discipline becomes more important, not less. A pack that’s stable at mile two and loose by mile ten is a problem that compounds. If you’re carrying a ruck plate for the first time, our guide to ruck plates vs sandbags vs water bottles covers what to start with and why the weight source matters.
Choosing the Right Gear for Stability
The packing technique matters, but the bag does the heavy lifting. Here’s how the main options stack up.
GORUCK GR1
The GR1 is the pack most serious ruckers land on if they stay with the practice long enough. The build quality is exceptional: most colourways run 1000D Cordura on the exterior (500D shows up on lighter variants and the internal lining), a solid internal frame sheet, and a laptop compartment that doubles as a plate sleeve. It’s genuinely buy-it-for-life construction, with zippers and structural stitching built to take years of regular loaded use without needing much maintenance.
The trade-off is price and features. At the GR1’s price point, you’re paying for durability rather than bells and whistles. There’s no built-in waist belt, no water bottle pockets, and the front pockets can be awkward to access when the main compartment is fully loaded. The shoulder straps also feel stiff out of the box — a known gripe that generally eases after a few weeks of regular use, but worth knowing going in. The GR1 comes in 21L and 26L variants: the 21L sits about two inches higher on your back for a lower, closer profile that suits shorter sessions, while the 26L trades that for a bit more breathing room and carrying capacity.
If you want a pack that’ll outlast several pairs of boots and won’t let you down on a long event or heavy training block, the GR1 is worth its salt. It’s not cheap, but not a con either — you’re paying for longevity.
GORUCK Rucker (paid link)
Where the GR1 is a general-purpose pack that happens to ruck exceptionally well, the Rucker is a training-specific pack that does one thing outstandingly. The plate pocket is positioned high and close to the back, which is exactly where you want it for spinal loading during a weighted walk, and the plate stays stable even during faster movement — that comes down to how close and high the pocket sits, not the fabric or the price tag, and it’s exactly what cheaper alternatives tend to struggle with.
The downside is that it’s explicitly a training tool. It doesn’t travel well, it doesn’t look subtle in an office, and the lack of everyday-carry features means most buyers end up needing both a Rucker and a separate travel bag — an extra cost that’s easy to forget when you’re only comparing sticker prices. It’s also expensive for a dedicated pack with no other real use case.
Weigh up what you’re actually paying for over time. For someone who knows they’ll be rucking three or four times a week with a weighted plate, the Rucker’s cost makes sense because it’s the only bag doing that one job well — buying cheaper and replacing it in a year costs more in the end. For someone who wants one bag that does everything, the GR1 is the more practical spend: one purchase instead of two.
Budget Alternative: Karrimor SF Predator 30
If you’re not ready to spend what a dedicated rucking pack like the GR1 or Rucker costs, the Karrimor SF Predator 30 is worth a look — UK retailers typically price it somewhere in the £70-90 range, comfortably under half what you’d pay for a purpose-built GORUCK. It’s a modular, military-pattern daypack with MOLLE webbing, a sturdy build, and a comfortable carry on longer routes. The modular layout means you can add pouches and attachments to configure it for your specific load.
The catch is that it’s not a purpose-built rucking pack. It doesn’t have a dedicated plate pocket or the high, tight load geometry that a GORUCK delivers. For moderate loads on day hikes or loaded walks, it’s genuinely capable. For serious rucking with plates over 15 kg, the lack of a plate-specific carry system shows — the weight doesn’t sit as stably as it does in a purpose-built option, and you’re more likely to be shopping for a proper rucking pack again within a year or two of regular heavy use. Stitching and finish aren’t as refined as premium rivals either, which is what you’d expect at under half the price.
It’s the honest budget pick for someone who wants rucking capability now without the outlay, and is willing to accept the cost of upgrading later if the habit sticks — rather than paying more upfront for a dedicated training tool.
Troubleshooting Common Packing Mistakes
Even with the right bag and solid technique, a few issues come up repeatedly. Here’s how to address them.
📺 Watch: Backpack Hurts Your Shoulders? Do This. — Upright Health
Blisters
Blisters under load aren’t primarily a footwear problem — they’re a heat and friction problem. When your feet generate more heat than your socks can move away, skin softens and shear forces from the gait change under load do the rest. The immediate fix is making sure your straps are tight enough that your pack doesn’t shift, and using socks that manage moisture actively. Merino socks like the Darn Tough Run (paid link) range hold up well for exactly this reason — the wool resists odour, keeps feet drier for longer, and the cushioned fit doesn’t slip or roll in the shoe under load. Regatta’s merino hiking socks are a more budget-friendly entry point if you’re not ready to spend on a premium pair.
See it on Amazon → (paid link)
Chafing
Chafing from straps is a known issue, particularly on longer sessions when sweat and friction combine. The fix is usually twofold: checking that straps aren’t too loose and using anti-chafe balm or tape on contact points. A chest strap that’s too low or too loose will rock and rub the sternum; a hip belt that’s too tight will dig in at the waist. The balance you’re looking for is snug but not constrictive — the pack should move with your body, not independently of it.
Knee and Back Pain
Load-related joint pain almost always comes back to one of two things: load that’s too heavy for your current conditioning, or load that’s poorly distributed. If your lower back is aching, revisit the high and tight principle — the weight should be sitting against your back, not hanging away from it pulling your shoulders forward. If your knees are taking strain, the load is almost certainly too heavy for where you are right now. Start lighter than you think. For UK beginners, a sensible starting point is around 5–10 kg, building gradually over weeks rather than jumping straight to heavy loads. Persistent pain isn’t a gear problem you can pack your way out of — both the NHS’s back pain guidance and the Chartered Society of Physiotherapy say the same thing: pain that isn’t settling after a couple of weeks is a reason to get it looked at by a GP or physio, not a reason to push on through it.
When the Bag Itself Is the Problem
If you’re using a standard backpack for loaded rucking and the shoulder seam is starting to fray or the stitching is pulling, the bag is telling you it wasn’t designed for what you’re doing. Never exceed a pack’s rated load — and be realistic about what a generic bag is rated for. A school bag rated to 10 kg loaded to 18 kg is a failure waiting to happen, usually at the worst possible moment.
Before you head out, a quick checklist: straps tight and sitting flat, chest strap fastened and positioned at the correct height, hip belt (if your pack has one) done up and pulling the load onto your pelvis rather than your shoulders, plate or heaviest items centred and pressed to the back panel, and compression straps cinched down so nothing can shift. If you’ve done all of that and your pack still bounces, the issue is almost certainly fit — either the pack is too large for your torso and sits too low, or the frame sheet isn’t stiff enough to maintain its shape under load.
For footwear that actually survives loaded walking on UK terrain, see What Shoes Survive a 20kg Ruck in the UK? — the right shoe matters more than most buyers realise once you’re adding serious weight.
Frequently Asked Questions
Can I use a school bag for rucking?
Only for very light loads and short distances. A school bag lacks the chest straps to stop it sliding, no dedicated weight spots to keep load stable against your spine, and structural integrity rated for the kind of sustained heavy loading that rucking involves. For occasional use at 5 kg or under, it’ll survive. Anything regular above that and you’re rolling the dice on the seams.
How much weight should I start with?
A common starting rule is around 10% of your body weight, but for beginners it’s worth starting significantly lighter — roughly 5–10 kg total — and focusing on getting the packing technique right before adding more load. Sport England’s guidance on building up any new activity says much the same thing in general terms: increase gradually rather than jump in at a level that risks putting you off or getting you hurt. Once the pack sits stable and your gait feels natural with that weight, increase over weeks, not days.
Do I need a purpose-built rucksack?
If you plan to ruck regularly or carry more than 10–15 kg, a purpose-built rucksack is the honest recommendation. The chest straps and dedicated weight geometry make a material difference to stability and spine loading. If you’re doing a one-off event or starting very light, a standard pack will do — but it’s worth knowing the trade-off going in.
What’s the best way to pack a rucksack for rucking?
Place heavy items (water bladders, ruck plates) close to your back and centred between your shoulder blades. Use compression straps to lock everything down so nothing can shift independently. Balance left and right to prevent twisting. Keep light, bulky items (spare layers, rain jacket) in the outer pockets and top of the main compartment. Tighten everything down — a stable pack doesn’t rattle when you shake it.
Rucksack Packing Zones
| Zone | Item Type | Position | Purpose |
|---|---|---|---|
| Core | Ruck plates, water bladders | High & tight against spine | Stabilises load, protects spine |
| Middle | Food, tools, first aid kit | Central layer | Balanced weight distribution |
| Outer | Spare layers, rain jacket | Top and outer pockets | Accessibility, bulk management |
| Side | Snacks, small pouches | Left and right | Prevents torso twisting |
| Compression | All items | Straps | Locks contents, eliminates air gap |
Where to Go From Here
The right packing technique and the right bag aren’t luxuries when it comes to safe, effective rucking — they’re the foundation. A bouncing pack doesn’t just feel uncomfortable; it shifts your gait, loads your spine unevenly, and turns what should be a solid training session into an injury risk. The good news is it’s a fixable problem. A purpose-built rucksack with chest straps and a proper plate pocket solves the bounce at the gear level. High and tight packing with compression straps does the rest.
If you’re new to rucking and not sure where to start with kit, grab our free resource — it walks you through exactly what you need depending on your goals, budget, and current fitness level. Get the Free First Ruck Gear Checklist to make sure you’ve got the basics right before your first weighted walk. Questions about specific gear? Get in touch and we’ll point you in the right direction.
Where This Advice Draws From
Rather than bundle the citations at the end where nobody follows up on them, they’re linked at the point they’re actually relevant: NHS and Chartered Society of Physiotherapy guidance sits with the back-pain section above, and Sport England’s advice on building up a new activity sits with the FAQ on starting weight. For the fuller picture on choosing a bag in the first place, see our GORUCK GR1 vs Budget Rucksacks: What Actually Matters for Rucking in the UK.
As an Amazon Associate we earn from qualifying purchases. The products linked above are ones we recommend based on independent research.