Your First Ruck: Distance, Pace, and When to Stop

As an Amazon Associate we earn from qualifying purchases. This page contains affiliate links — if you buy through them, we earn a small commission at no extra cost to you.
“How far should I ruck on my first session?” It’s the question almost every beginner starts with, and it’s the wrong one. Distance tells you nothing about whether a body is ready for load — plenty of people can walk five miles unloaded without a second thought, then find the same distance with 15 kilograms on their back leaves their shins aching and their shoulders wrecked by the end.
The metric that actually matters isn’t how far you go. It’s how long your tendons, joints and stabilising muscles have been working under weight they haven’t adapted to yet. Swap the question and the rest of this gets simple: here’s the time-based protocol that builds fitness without the overuse injuries that put most first-timers off rucking for good.
What Actually Happens to Your Body When You Add Weight
Your upper traps — the muscles between your neck and shoulder blades — work constantly from the moment you shoulder a pack or strap on a vest. They stabilise the weight, keep the straps from digging in, and maintain your posture against a load your body hasn’t learned to handle yet. This is why shoulder fatigue often hits before leg fatigue on a first ruck, especially if you’re using a backpack without a properly adjusted hip belt.
📺 Watch: How to Fit a Backpacking Pack — REI
Load-bearing activity does upgrade your cardio system. But the cardiovascular benefit is a byproduct of the mechanical challenge, not the point. The point, particularly in the first few sessions, is letting your tendons, ligaments, and bones gradually adapt to carrying weight. These tissues remodel slowly — significantly slower than muscle — which is why pushing distance before they’re ready is how shin splints and plantar fasciitis start.
The mechanism is straightforward: added weight changes your gait. Your stride shortens slightly, your foot spends more time on the ground with each step, and the load transmitted through your ankle and shin increases. Unloaded, your body handles this easily. Loaded for the first time, for longer than your tissues are conditioned to handle, that’s where the damage begins.
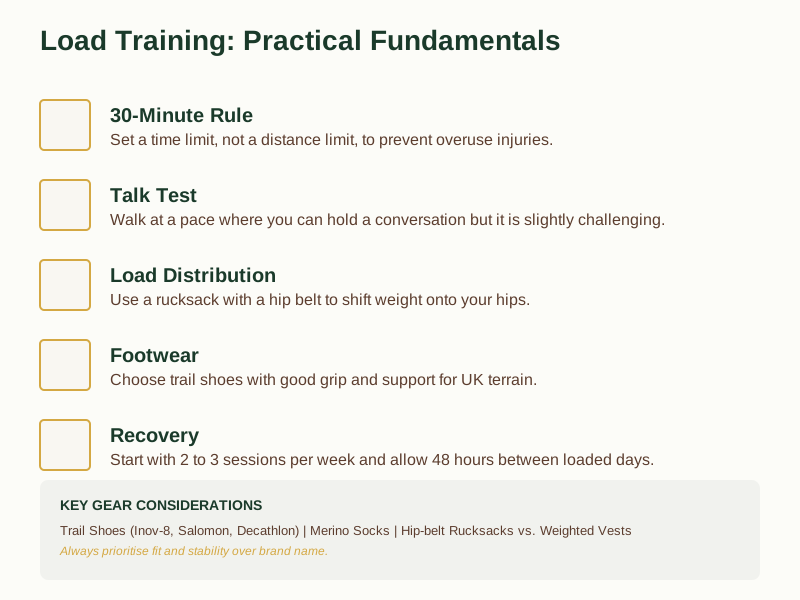
If you’re choosing between a weighted vest and a rucksack, the load distribution matters here too. A vest keeps weight high and close to your torso’s centre of gravity — better for stability, better for running-adjacent movement. A rucksack with a hip belt can move a meaningful portion of the load onto your hips. For your first session, that hip belt quality is worth checking before you buy: a narrow belt concentrates 15 kilograms onto a strip of skin no wider than a hand, which is exactly where chafing starts on longer walks.
The 30-Minute Rule
Set a time limit, not a distance limit — that’s the one habit this whole article is built around.
On your first ruck, your target is 30 minutes. Not 5 miles, not 10,000 steps — 30 minutes. Stop when the watch hits 30, even if you’re feeling fine and the route isn’t finished. Think of it as a trade rather than a rule: stopping early costs you a slightly shorter first outing; pushing on risks weeks off your feet with shin splints or plantar fasciitis, because your cardio system will feel ready long before your tendons and bones are. Weighed against each other, the downside is heavier than the upside, so the cap wins.
New tendons and bones take time to strengthen under load — that’s how connective tissue works, and it’s a slower process than the cardio fitness you’ll notice improving first. Pushing past 30 minutes on a first session is the most reliable way to develop the shin splints and plantar fasciitis that sideline beginners for weeks at a time. The cap isn’t really about knowing your limits yet. It’s that the trade-off is already decided before you set off.
The contrast with standard advice matters here. Most general fitness guidance focuses on distance: complete a 5K, walk 10,000 steps, cover X miles. That framing works for unloaded walking. Under load, it leads people to push further than their tissues are ready for, because they feel fine — the fatigue comes later, often after the session, sometimes the next morning.
What does 30 minutes actually look like? On a flat UK canal towpath or coastal path, you’re covering roughly 2 to 2.5 miles at a brisk walk. On hillier terrain, less. That’s plenty for a first session. The goal isn’t to test your limits — it’s to establish a baseline your body can recover from and build on.
If you can’t make 30 minutes on your first go, stop at 20. Or 15. The number matters less than the habit of stopping before you feel pain. Pain that starts during a session and persists afterwards is your signal to back off; soreness that appears the next day is normal. If you’re unsure where you fall, err towards shorter. You can always add time next week.
Pacing for Beginners: The Talk Test in Action
A good starting pace for rucking is one where you can hold a conversation, but it’s slightly challenging to do so. That’s the Talk Test — a simple, no-gadget way to gauge intensity that’s generally recommended for steady-state cardio work.
If you’re breathing so easily you could recite a paragraph without pausing, you’re going too slowly to challenge your cardio system under load. If you can’t get more than a few words out between breaths, slow down — that’s zone 3 or above territory, and sustained high-intensity rucking is where form breaks down and foot or skin irritation kicks in.
The warning signs that your pace is too fast tend to show up in the load handling first. When rucking speed increases, weight starts shifting and bouncing inside the bag or vest — and that’s when chafing accelerates, shoulder fatigue compounds, and the risk of hot spots on feet rises sharply. Getting the pace right isn’t about suffering less in the moment; it’s about keeping the load stable enough that the session stays safe throughout.
Most beginners find a brisk walk — roughly 4 to 5 kilometres per hour on flat ground — hits the right intensity. GORUCK’s general pace guidance for rucking sits around 15 to 20 minutes per mile, which translates to about the same range. On rough UK trail or in wet conditions, that pace will feel harder than the numbers suggest, which is fine — effort is what you’re building, not speed.
Gear Check: What You Need Before You Step Out
You don’t need much kit for a first ruck, but the basics matter more than most beginners expect. A poor shoe choice or the wrong socks can turn a manageable session into a blister problem before you’ve covered a mile.
For footwear, trail shoes are the honest recommendation for most UK terrain. Shoes like the Inov-8 Trailfly G 270 (paid link) offer excellent grip and durability under load — independent reviews put a realistic midsole lifespan at somewhere in the 300 to 400-mile range before it packs out, with the outsole and upper usually lasting well beyond that. The Salomon Speedcross Peak (paid link) is a specialist mud shoe that performs well on soft, wet ground but can feel heavy and less stable on firm UK concrete or tarmac. Neither is cheap, but both are worth their salt for load-bearing work: the grip and stability they provide prevents the foot sliding and hot-spotting that cheaper, less structured trainers tend to produce once weight is added.
Buy Salomon Speedcross Peak on Amazon → (paid link)
View on Amazon → (paid link)
On a budget, Decathlon’s Evadict range is a functional starting point — decent grip, reasonable durability for the price, and far better than a worn pair of running trainers. Just manage your expectations on comfort and long-term refinement.
Socks are the other non-negotiable. Merino wool options like Darn Tough Run (paid link) or Smartwool Hike (paid link) keep feet dry and resist odour far better than synthetic alternatives — which matters more than people expect when you’re walking for 30 minutes with added weight. Damp feet from poor moisture management soften skin fast, and that’s the fast track to blister formation under load.
See Smartwool Hike on Amazon → (paid link)
See Darn Tough Run on Amazon → (paid link)
At a glance, here’s how those picks and the two load-carrying options compare:
| Category | Recommendation | Key Benefit |
|---|---|---|
| Footwear | Trail shoes (e.g., Inov-8 Trailfly) | Superior grip and stability under load |
| Footwear | Salomon Speedcross Peak (paid link) | Specialist mud performance on soft ground |
| Footwear | Decathlon Evadict | Budget-friendly option with decent durability |
| Socks | Darn Tough Run (paid link) | Moisture management and odour resistance |
| Socks | Smartwool Hike (paid link) | Keeps feet dry during longer sessions |
| Load | Rucksack with hip belt | Shifts load to hips for better stability |
| Load | Weighted vest | Keeps weight high and close to the torso’s centre of gravity |
Before you head out, check your kit against what you’ll actually be carrying. Now you know what to look for — Get the Free First Ruck Gear Checklist to make sure nothing gets missed before your first session.
Frequently Asked Questions
Can I ruck every day?
Start with 2 to 3 times a week. Your tendons and ligaments need time to adapt to load, and that adaptation happens between sessions, not during them. Give yourself at least 48 hours between loaded sessions in the first few weeks. If you’re walking unloaded on off days, that’s fine — just don’t add weight until the recovery feels solid.
What if I can’t finish 30 minutes?
Stop early and feel good rather than pushing through and feeling pain. 15 minutes is a perfectly valid first session. The habit of stopping before discomfort turns into injury is more valuable than hitting a specific number. You can extend the window next week.
Do I need special shoes for rucking?
You need shoes with good grip and adequate support under load. Trail shoes are usually the best choice for UK terrain because they handle mud, wet grass, and uneven paths better than general trainers. Avoid shoes with worn soles or minimal cushioning — added weight amplifies every hard surface underfoot.
What This Is Based On
The tendon-and-bone adaptation timeline above lines up with NHS general exercise guidance, and GORUCK’s own published pacing figures — 17 to 20 minutes per mile for beginners, tightening towards the 15-minute-per-mile Army standard with experience — back the pace range given earlier. For the wider injury-prevention picture, Sport England and the British Association of Sport and Exercise Medicine both publish general activity and sports-medicine guidance worth a look if you want to go beyond what one article can cover. None of it replaces an actual GP or physio if pain persists past ordinary first-week soreness. And for the full beginner picture this article assumes — load, frequency, everything around the edges — that’s covered in How to Start Rucking in the UK: The Honest Beginner’s Guide.
Where to Go From Here
The 30-minute rule is the one habit worth establishing from session one. Stopping at the time limit — not the distance limit — is what separates beginners who build consistently from those who pick up an overuse injury in week two and have to stop entirely.
Pace matters too: keep it conversational, keep the load stable, and back off if you’re bouncing or shifting. Gear is the support act — good trail shoes and proper socks prevent the blisters and hot spots that make rucking miserable before you’ve given it a fair chance.
The honest answer for your first ruck is simple: 30 minutes, a brisk walk pace, decent footwear, and merino socks. That’s it. Everything else — heavier loads, longer routes, faster paces — comes later, once your body has had time to adapt.
Ready to get started? Grab the Free First Ruck Gear Checklist and head out this weekend. Your first session doesn’t need to be impressive. It just needs to happen.
As an Amazon Associate we earn from qualifying purchases. The products linked above are ones we recommend based on independent research and owner feedback.